
2 Minutes Read
Listen to the Blog
Smooth motion makes prototypes feel real.
1. What Is Smart Animate in Figma?
Smart Animate automatically animates differences between two frames or component states like position, size, color, or opacity changes.
It’s one of the easiest ways to bring motion design into your prototypes without complex tools.
Think of it like “auto-animation” if two layers share the same name, Figma knows how to smoothly transition between them.
2. Why Smooth Motion Matters
Motion in UI design isn’t just pretty, it communicates feedback and context.
Here’s why it matters:
Guides user attention: motion helps users know what just changed.
Creates visual continuity: smooth transitions feel natural, not jarring.
Improves usability: users understand interactions faster.
Adds delight: thoughtful animation improves experience and brand feel.
3. How to Use Smart Animate
Step 1: Create Two Frames
Design two states of your layout or component:
- Frame 1 → Default state
- Frame 2 → Hover / Expanded / Next screen
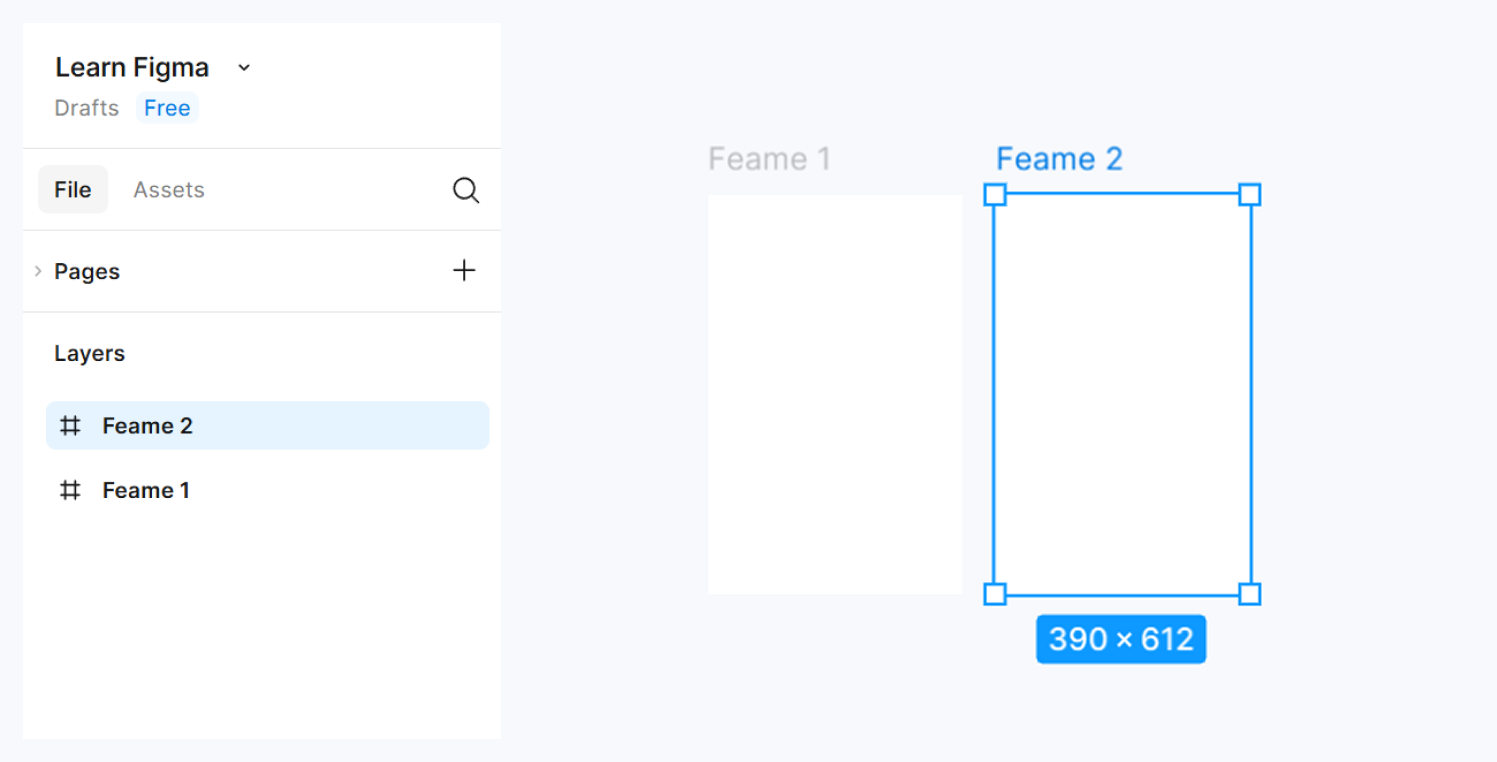
Step 2: Keep Layer Names Consistent
Ensure identical layers have the same name in both frames.
Smart Animate relies on these names to match elements.

Step 3: Connect Frames
Switch to Prototype Mode → Select your trigger element → drag the blue arrow to Frame 2.
Step 4: Set Animation
In the Interaction details:
- Animation: Smart Animate
- Easing: Ease in-out
- Duration: 300–600ms (ideal for most UI transitions)
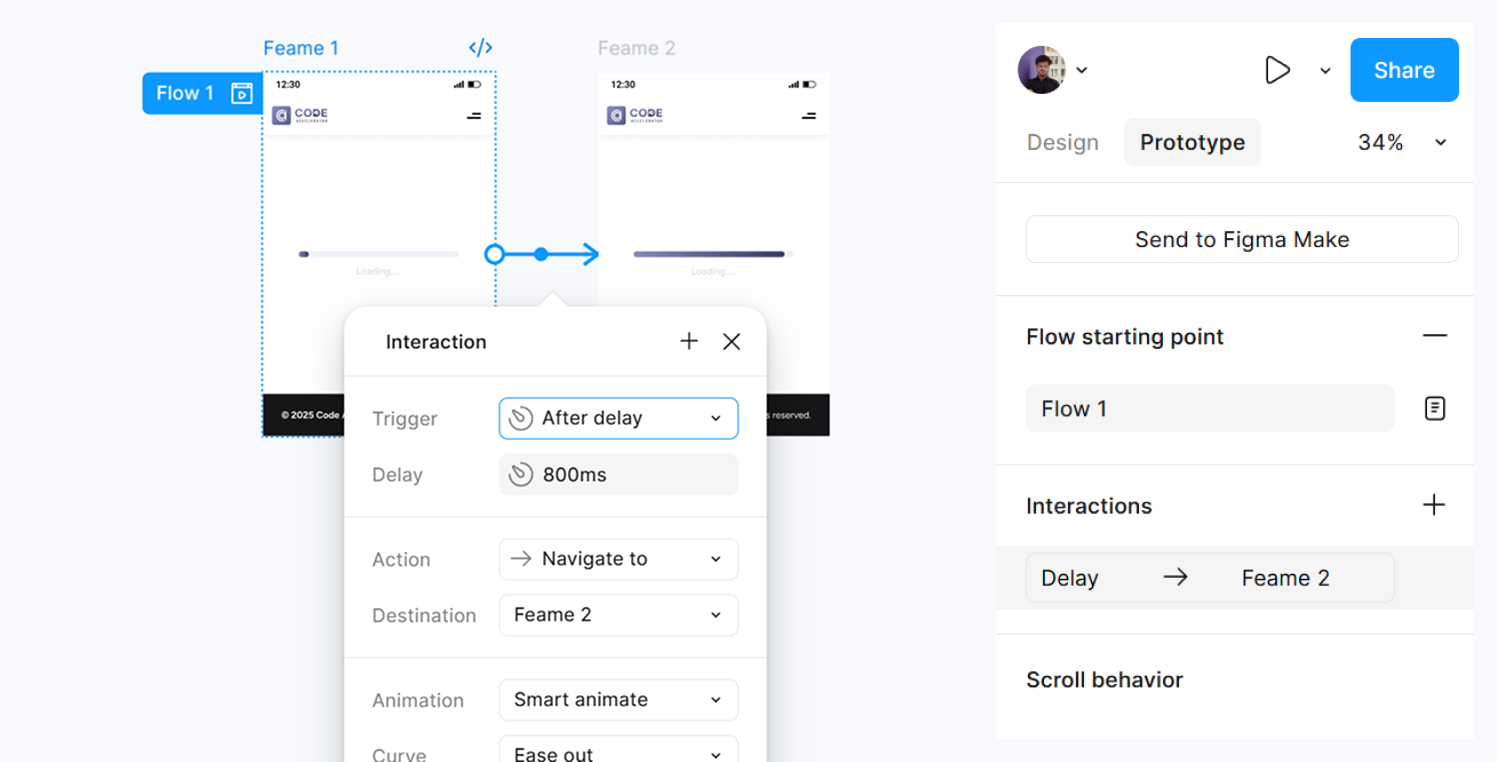
Step 5: Preview
Click Present ▶️
Watch your layout animate smoothly elements move, fade, and resize in one fluid motion.
4. Transition Types You Can Try
Page Transitions
- Animate between full-page screens (great for app navigation).
Component Transitions
- Use Smart Animate between component variants (buttons, modals, etc.).
Microinteractions
- Animate icons or toggles changing state.
- Add subtle feedback (like a heart filling or a switch sliding).
5. Pro Tips for Realistic Animation
Use easing curves wisely: “Ease out” feels natural for exits, “Ease in” for entries.
Keep duration short: 150–600ms max for UI transitions.
Animate key properties only: avoid overwhelming motion.
Combine Smart Animate + Interactive Components for advanced effects.


%201.png?width=1016&height=912&name=image%20(54)%201.png)